今年の計画
概要
今年の計画を立てます。
1月1日に計画を立てようと思ったのですが、やる気がゼロでした。 ということで2日に書いてます。
年間計画
月ごとに何をやるか計画を立てます。 一番上にあるほど優先順位が高いです。多分。
1月
- 学校の研究発表
- 新しい研究をはじめる(多分カルマンフィルタ絡み)
- 何をする必要があるか議論をする
- mcl2のパッケージ作製を終わらせる
- ndt_scan_matchingの実装や論文を見る
- 自動運転の大会
2月
- IMU(つくば用)とGNSS(研究とつくば用)を使い始める
- ekfの勉強 & ROS2パッケージの実装
3月
- 就活???
- 推薦を狙う
- hybrid a starの勉強&実装
- pure pursuitの勉強 & 実装
- 就活???
4月
- 速度関連の実装
- 加減速のスムーザー
- 障害物近辺通過時の低速
- 速度関連の実装
5月
- パッケージをまとめる?
6月
- 論文を書き始めたい
7月
- つくばで研究を試す
8月
- つくば
9月
- つくば
10月
- つくば
11月
- つくば
12月
- 記事を書く
2022年を振り返って
概要
2022年を振り返り、反省をします。
振り返り
毎年恒例、月ごとに振り返っていきましょう。 いつもどおりTwitterを頼りにしていきます。
1月
どうやら何かを提出したようですね。
つくばチャレンジの参加レポートを提出した
— BEIKE (@BEIKE_RE) January 4, 2022
携帯を買ったようです。 良い買い物をしたと思ってます。
my new gear... pic.twitter.com/G1pvOXx86U
— BEIKE (@BEIKE_RE) January 6, 2022
卒論の発表が終わったようです。
卒論発表し終わった😎
— BEIKE (@BEIKE_RE) January 28, 2022
卒論お疲れ様でした。
2月
免許の更新をしたようです。 全く車には乗ってません。
免許の更新をした
— BEIKE (@BEIKE_RE) February 4, 2022
おっと!何をしてたんでしょうかね? 進捗が何も無いのかもしれません。。。
3月
来たらしいです。
来た! pic.twitter.com/bau0Xtheb2
— BEIKE (@BEIKE_RE) March 12, 2022
卒業おめでとうございます。
気づいたら、学部卒してた🥺
— BEIKE (@BEIKE_RE) March 22, 2022
お!進捗ですね!
こちらは、高画質な動画とRVizでの可視化の動画を合わせた動画です👀https://t.co/SoQpiXIEQi
— BEIKE (@BEIKE_RE) March 25, 2022
4月
まじで焦りました。 一方、このころはちょうど人生初めての彼女が出来た時でした。 しかし、急に別れを告げられることとなるとも露知らず。 本当にショックで死にそうになりました。 3日間ぐらいはずっと泣いてました。。。 出会いがあれば、別れもあるですよね(´;ω;`)
自己位置推定のマッチングの話をしている時にマッチングアプリの通知メールが画面共有され困惑するミーティングメンバー
— BEIKE (@BEIKE_RE) April 14, 2022
ああ。 なんか、うるさいやつがあった気がする。
今日の津田沼なんかうるさいな
— BEIKE (@BEIKE_RE) April 23, 2022
5月
文明の利器を手に入れたそうです。 なお、今は。。。。(使ってない)
便利なキ-ボード⌨ pic.twitter.com/gPKxmykzW1
— BEIKE (@BEIKE_RE) May 10, 2022
後輩の教育に力を入れ始めました。
3年生チームがSLAM中 pic.twitter.com/aHJdsvMCZU
— 千葉工大未ロボ上田研 (@uedalaboratory) May 26, 2022
6月
GitHub Actionsで遊んだようです。 たまに凝りたくなります
GitHub Actionsで回したナビゲーションの結果を動画として出力できるようになった。
— BEIKE (@BEIKE_RE) June 5, 2022
本当に動いてるんだな👀https://t.co/so2WgCC64z
真夏のナビゲーションってやつですね
きちゃ! pic.twitter.com/bEzKBuiSMH
— BEIKE (@BEIKE_RE) June 19, 2022
後輩のを見てるだけでした。(お前もやれ)
津田チャレなう pic.twitter.com/Dif70jspuo
— BEIKE (@BEIKE_RE) June 25, 2022
就活し始めましたね
SPI疲れたESも出さねば。
— BEIKE (@BEIKE_RE) June 26, 2022
7月
ついにはじまりました。つくばチャレンジ。
3台とも車検通った😎#つくばチャレンジ2022 pic.twitter.com/OQ4wJDB6k0
— BEIKE (@BEIKE_RE) July 2, 2022
まじくそ暑くて死にそうだった記憶があります。ロボットは動いてたので、感心しました。
そういえば、7月2日の炎天下の中のつくばチャレンジでひたすら、Raspberry Pi 4 Model B上でナビゲーションスタックを動かしたり、ビルド回してたけど熱落ちしなかったなぁ💪
— BEIKE (@BEIKE_RE) July 9, 2022
おめです。
今年は、Raspberry Pi 4のみで、確認走行区間を完走しました💪
— BEIKE (@BEIKE_RE) July 23, 2022
去年は、ゲーミングPCを載せてました💻
壮観ですね。
つくばシミュレータ😎
— BEIKE (@BEIKE_RE) July 30, 2022
公園の折り返し地点までシミュレータ環境を作った
こうしてみると、作成した2次元マップが割と合ってることがわかる💪 pic.twitter.com/jXz64mkMz6
8月
micro-ROSで遊び始めたようです
micro-ROS使って、ジョイスティックコントローラでDCモ-タを動かしてみた😃
— BEIKE (@BEIKE_RE) August 8, 2022
Raspberry Pi 4: micro-ros-agent、ジョイコン用ノード(pub /cmd_vel)
NUCLEO-F446RE: micro-ROS(sub /cmd_vel)、速度制御(PID)
モ-タドライバ: DCモ-タ駆動/制御用 pic.twitter.com/G45idgtbaZ
ROS2でMCLを実装し始めたようです
各パーティクルの重みを正規化した後に最尤なパーティクルを探してた。。。
— BEIKE (@BEIKE_RE) August 25, 2022
それは、全部が選ばれるわけだ🥺
この月に多分OONDAのインターンがあった
9月
t4の方とお話しました
自己位置推定について色々話せて楽しかった
— BEIKE (@BEIKE_RE) September 2, 2022
研究を進めているようです。(ようやく???????バッキャロー)
自己位置推定失敗のお祈りをしている🙏(研究)
— BEIKE (@BEIKE_RE) September 2, 2022
3万?
パーティクル3万の威力を確認中
— BEIKE (@BEIKE_RE) September 21, 2022
10月
はい。そうです。
あ、10月か
— BEIKE (@BEIKE_RE) September 30, 2022
ここは、まじで難しい場所です(自己位置推定)
信号がある交差点で自律走行した
— BEIKE (@BEIKE_RE) October 1, 2022
(信号機認識はしてない)#つくばチャレンジ2022 pic.twitter.com/NErvpG9Aqv
嬉しいです。
後輩のチ-ム(3年生)も確認走行区間を完走した🎉#つくばチャレンジ2022 pic.twitter.com/qktX1KynMN
— BEIKE (@BEIKE_RE) October 23, 2022
11月
動的パラメータ便利です。
つくばチャレンジ用にemcl2の
— BEIKE (@BEIKE_RE) November 8, 2022
動作モデルの誤差パラメータを
動的パラメータとして雑に実装🙂https://t.co/n7SAWCh9SB
頑張りましょう。(´;ω;`)
来年はツヨツヨ自己位置推定で挑む👶
— BEIKE (@BEIKE_RE) November 20, 2022
12月
予稿とサッカーで盛り上がってるそうです
予稿を書かないとと思いながらサッカー観てる?💩
— BEIKE (@BEIKE_RE) December 5, 2022
全くわからないです
micro-ROS何もわかってない🥲 pic.twitter.com/VY7wprPPQR
— BEIKE (@BEIKE_RE) December 18, 2022
はい。
今日はなんの日なのか全く分からないです。
— BEIKE (@BEIKE_RE) December 24, 2022
はい。
この記事を書くのに12月を使ったといっても過言ではないです。
遅れてすみません
— BEIKE (@BEIKE_RE) December 25, 2022
なんとか書けました😇
micro-ROSリスマス🎅🎄
micro-ROSとros2_controlで構成したDiff Botでナビゲーションしてみた https://t.co/GTZ0R3X93G
まとめ
なんだかんだ手は動いてそうですが、私が求めていた結果は手に入れられてなさそうです。
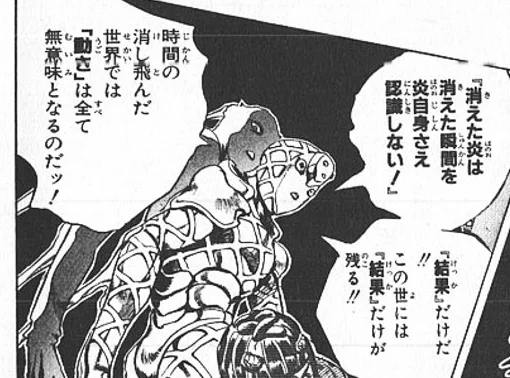
結果だけだ!この世には結果だけが残る!
研究に今年も時間をあまり避けなかったようです。
新しいチャレンジはたくさんしました。
今しかできないことを考えて、来年は頑張ろうと思います。
おつかれした
ros2ポーティング作業メモ
概要
現在emcl2のros2ポーティング作業中です。
もしかしたら、このメモが役に立つのでは?
と思い、書き始めました。
まずは、GPTさんに聞いてみる?
GPTさん教えてください!!
ros1のc++パッケージをros2のパッケージにするための、ポーティングを行っているのだけど、良い手順知ってる?

いくつかのポイントを考慮しながら、以下のステップでROS1のC++パッケージをROS2に移植することができます。

1. システムを構成するすべてのパッケージを確認する
2. パッケージの依存関係を確認する
3. パッケージをROS2用のCMakeLists.txtファイルに書き換える
4. メッセージをROS2用に書き換える
5. ライブラリをROS2用に書き換える
6. ノードをROS2用に書き換える
7. シミュレータをROS2用
ふむふむ、俺が考えていた作業手順とほぼ同じだ。
ros2ポーティング手順?(メモ)(Pythonは知らん)
- まずはbuildができるように、
CMakeLists.txtとpackage.xmlのファイルを修正 - 次にinclude
移動ロボットのためのポータブル多仮説モンテカルロ法ローカライゼーションという論文を読む
概要
面白そうなパーティクルフィルタの論文を見つけたのでメモしながら読む
論文
https://arxiv.org/pdf/2209.07586.pdf
タイトル
Portable Multi-Hypothesis Monte Carlo Localization for Mobile Robots
メモ
・研究背景
自己位置推定は、地図を使用してある地点から別の地点へ移動するために必要な能力。
そのため、自己位置推定の向上は繊細な作業を行うために非常に重要である。
・従来研究
過去20年間に複数の仮説に基づく自己位置推定が開発された。
カルマンフィルタを用いたハイブリッドな自己位置推定方が
Jensfelt と Kristensenによって提案された。
chungとLinは、AMCLのアルゴリズムを30回実行し共分散行列に 基づいて1つのAMCL推定を決定する方法を提案。
・研究目的
MCLのアルゴリズムにおいて、複数のパーティクルの分布を維持し
常に最適なパーティクルの分布を出力とする新しい位置推定を提案する。
・そうなんだー
パーティクルフィルタの推定の信頼度/不確かさを表すものとして
共分散行列から求めるのは効果的ではない。
ある任意の文字列を含むファイル/フォルダを削除
ls | grep -P '^(?!.*rviz).*$' | xargs rm -rf